Monday, April 13, 2015

Roasty Toasty Bird 1.5

Alright, so there is roasted chicken, roasted rosemary potatoes, and some green beans that are still forthcoming. Preparing for Monday had to take precedence. Sad, I know. Alas, we are subject to having to do the responsible thing. So, there is that. I will hope to get that in soon.

Coming up for tonight...."Working my way back to the grill with that burning love inside."

Steak, homemade roasted bell peppers, and a vegetable with a license to kill.

It will be a great one! Stay tuned!

Sunday, April 12, 2015

Batter Up!

One of the best things about a perfect Sunday morning is a great breakfast. It is a great way to enjoy any weekend. This pancake recipe is one of our favorite breakfast options,  it is super simple, customizable, and comes together quickly. 

I make a few adjustments to this recipe that make it work for us. I also have one little special ingredient that I will talk about later, which is a must in pancakes or french toast. Yes, I will cover that as well.  As always, make any changes that work for you. Food should be something that can be approachable no matter what you like or dislike.


The recipe has been adapted from the Joy of Cooking.

Ingredients:

    1 1/2 cups all purpose flour
    3 tablespoons sugar
    1 teaspoon baking powder
    1/2 teaspoon baking soda
    1 teaspoon salt
    1 1/2 cups buttermilk or 1 cup
    3 tablespoons butter, melted
    2 eggs


Directions: Makes 16 3-inch pancakes

Whisk together in a large bowl the following items:
1 1/2 cups all purpose flour
3 tablespoons sugar
1 teaspoon baking powder
1/2 teaspoon baking soda
1 teaspoon salt


Combine in another bowl:
1 1/2 cups buttermilk 1 cup buttermilk
3 tablespoons butter, melted
2 eggs
(1/2 teaspoon vanilla extract)


Mix the liquid quickly into the dry ingredients. Grease a skillet lightly with butter or oil and do so as needed between batches. The heat is correct when a few drops of cold water on the skillet bounce and sputter, not boiling or evaporating. Use 1/4 cup batter for each pancake. When bubbles appear on the surface on the pancake and the edges have browned, turn the cake and cook only until the second side is done.


Changes I make to the original recipe:

For me, these pancakes don't need the suggested 3 tbsp of sugar. Usually once syrup is applied that can address the sweetness/sugar requirements for this recipe.

I like vanilla, but I'm more of a savory breakfast guy -- so, I don't think vanilla is needed here. But, if you want it, or that works for your family, then do it.

The amount of buttermilk is also adjusted as a result of the effect of being at sea level rather than an a higher elevation. I use 1 cup versus the 1 1/2 cups that is called for. If your batter looks too thick, you can always add a little more milk.

Okay, now, make sure no one is looking over your shoulder because I'm about to reveal my secret ingredient...ready?

Lemon zest. Yes, lemon zest. First of all, there is nothing more fragrant than freshly grated lemon zest. Think of what happens when you peel an orange and you get an intense flavor that wafts through the air. We are applying max flavor to these pancakes, which gives them a really pleasant citrus note.

You may want to add this tool to your kitchen collection. I use this tool all the time for grating hard cheese, shaving chocolate, and zesting fruit  -- it is called a microplane grater and it is awesome. Have you ever seen a cooking show where the host is finishing up a pasta dish and suddenly it starts snowing cheese? Yup, that is the microplane grater. You can find one in practically any store with a kitchen section. If you want more information then I would recommend looking it up on Google.

OK, less typing, more cooking. Picture time!

Everyone in the pool at the pre-mix party.

Stirred, not shaken. Don't overwork this batter, just make sure everything is incorporated together.

Butter makes pancakes better. If you have a cast iron pan, then use it. If not a heavy bottomed, non-stick pan will do nicely.

Two practically perfect pancakes.

Here is my breakfast. What are you having? OK, just kidding! Here is the finished product. Of course, bacon is optional, and eggs make a great substitute for bacon, truly the options are endless.


Here is another photo finish.

By the way did I mention that left over pancakes make a great toast substitute, sandwich bread, or just a great snack?  Maybe a breakfast sandwich? ;)  If you have a few left, I highly recommend it! Use your toaster to warm the pancakes through and re-crisp the edges if they get a little mushy from being in the fridge.


Roasty Toasty Sunday Bird

Here is  a little tease for what will be on the menu for this evening...

Tonight is a classic but super simple roasted chicken. After this you won't ever look at a store bought rotisserie chicken the same again! The skin is seasoned and crispy, the meat is flavorful and moist, and this is something that you can put on the dinner table any night of the week. It is a perfect Sunday night dinner option that we will pair with some rosemary roasted red potatoes. What could be better?  Pair this with a good glass of wine, a beer, or any drink, and this will become a Table Fare showstopper.

Oh, I may have another breakfast post that will be forthcoming as well. :)

Saturday, April 11, 2015

Fish On!

Ok, so we are going backwards here for a minute. As part of the Friday Conundrum I had decided to marinate some Halibut. As soon as I sat down on the couch after getting the fish marinating, I promptly fell asleep. Then, I couldn't decide what to make as indicated by my previous post.

Fast forward to a few hours ago and it was time to use the Halibut.  Oh, before we get to that, because the marinade had citrus in it I pulled the fish out after a few hours to make sure I didn't end up with ceviche. The recipe for the marinade is included below, it is part of a marinade that we usually use for sea bass.

1/4 cup dry vermouth or dry white wine.We used Pinot Grigio.
2 tablespoons fresh lime juice
2 tablespoons minced fresh cilantro
2 teaspoons olive oil
2 cloves of garlic minced. Use more or less if you like.
 
We had about a 1 1/2 lb Halibut steak, but certainly you can use less.
 
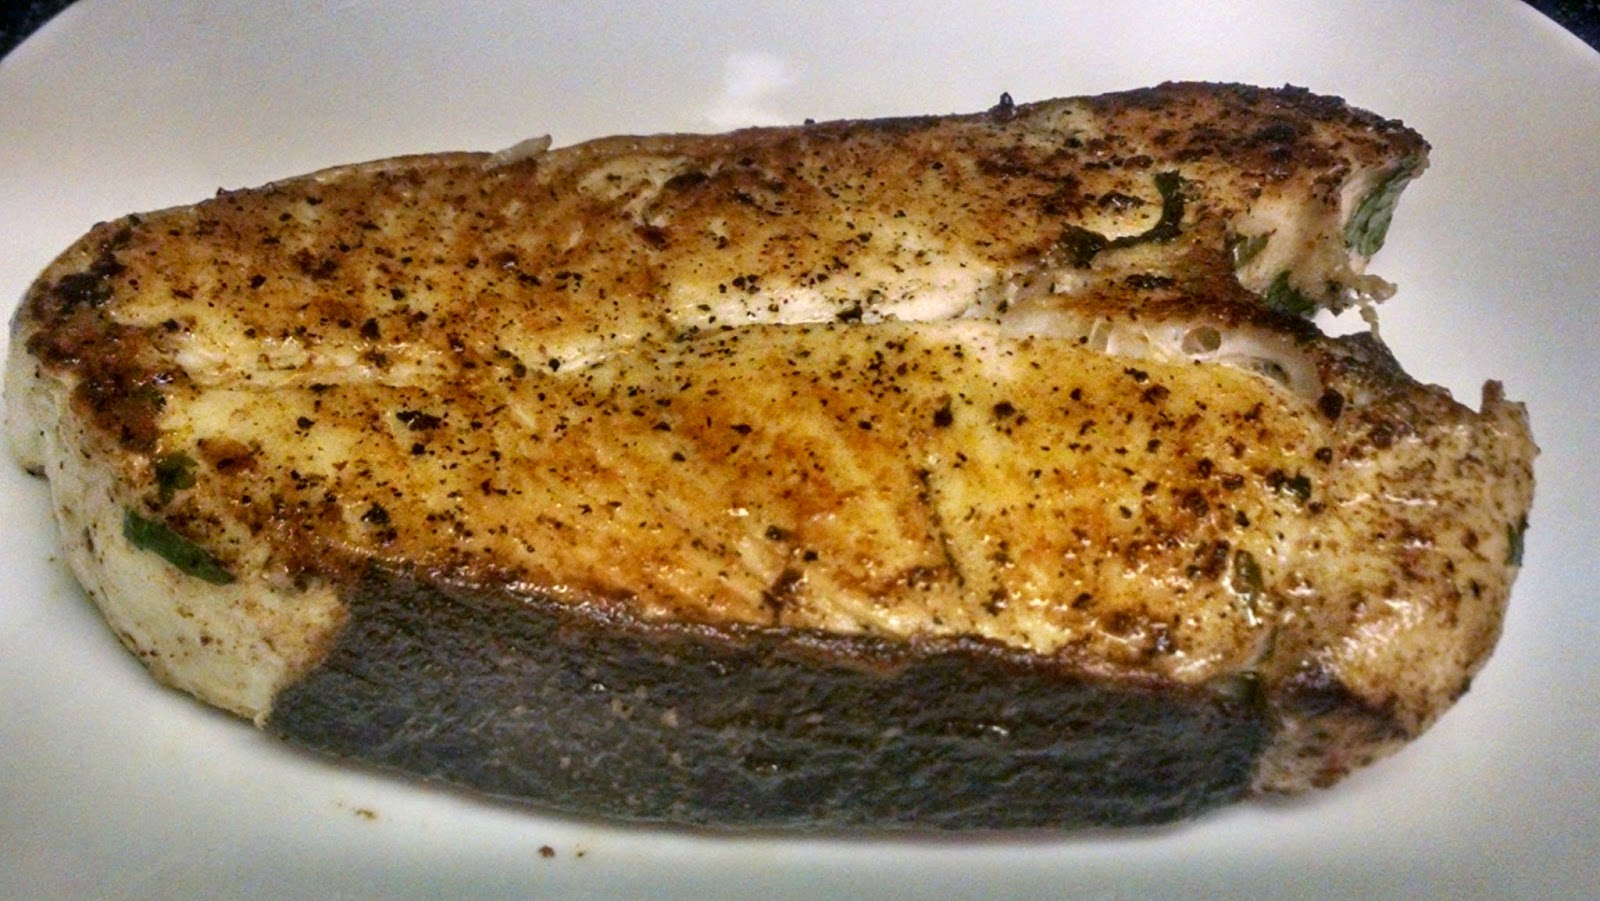
Ok, here is the good news. This fish cooks up amazing and it looks awesome! Here is the proof.


Here is the fish right before it went into the pan. I dried it off with a paper towel to draw out the excess moisture to help achieve that great color. Also, hit it with a little salt and pepper right before it goes in the pan to help add more flavor as the halibut cooks.
 
I use butter and a little oil here to get this fish going. Again, channel your inner Julia Child if you think you need more butter. Typically I use about 3 tsp of oil and a small pat of butter. Okay, ready for more?

I suspect you know how we achieved this color. Lets review, don't touch it!! Let it go (sorry for the Frozen reference). Leave it in the pan and let it get some color. I think I flipped it once and then got both edges.

Decided we needed a little green, nothing fancy really. There are a number of ways to cook asparagus. Ours is covered with water about 2/3 of the way up and salted heavily, which will help flavor the asparagus as they get tender. To check them you should be able to pierce them with a fork. You want a little resistance, otherwise the asparagus will be soft and mushy. OK, drain off the water and finish with a little oil, salt, and pepper.

This is your finished product. 

Now the bad news. For whatever reason, although the fish looked good, it didn't deliver as billed. It was cooked well, but it really lacked the punch of flavor we expected. I can think of three things that happened to cause the letdown. 
 
First, it could have been that the citrus in the marinade penetrated too far into the fish. 
 
Second, the marinade choice was just not meant for halibut. In fact, this recipe does kill with Chilean sea bass -- it is an absolute winner and that recipe calls for grilling the fish.  Here is the link to the full sea bass recipe.  http://www.myrecipes.com/recipe/lime-marinated-grilled-sea-bass

We do everything that the sea bass recipe calls for except using  the low sodium soy sauce. Again, it is easier to control the salt when you add it without killing the flavor of the sea bass. However, if you want it, go for it.

Lastly, the fish may have been a touch over-cooked either due to the citrus or me trying to get good color on the fish.

Finally -- on a whim I decided to add the leftover marinade to the pan I had cooked the fish in, and turned it into a pan sauce. That really made the fish pop with flavor. I was happy to have that to add to our plates, because while on the whole the meal was a little lacking, the fish finally jumped off the plate.
 

Better McBreakfast

While running errands this morning before having anything to eat, I began to dream about breakfast. Seems logical, right? So, looking at Greasy spoon 1, McBreakfast here, Breakfast King there, I suddenly wanted a breakfast sandwich. But with all the questions of what's in this, how is it made, and what it might cost -- I knew it was pretty likely I could make it exactly the way I wanted it, and not in a microwave. 

So, a breakfast sandwich it is!

Your ingredients:
  • English Muffin, any bread will do if English muffins aren't your thing. 
  • Sausage, you can always use chicken sausage or a substitute a meat option of your choice.
  • Eggs, I like scrambled eggs, but an over easy or fried egg would take this to another level.
  • Cheese, in my opinion cheddar is better but any cheese will do. You could also go with a pepper jack, a smoked cheese, or mozzarella.  I prefer slicing it off the block myself, but do what makes sense for you.
 As usual, this comes together really quickly.  Most of  that time is taken up by cooking the sausage or other meat option.

Oh, this is might be the same price as McBreakfast's sandwiches, but the quality and homemade value is, well, priceless.
 
Boom. Done.


Photos you say? Okay, here you go.

 Your ingredients

Ready!


Sorry McBurger King, our is better!

Friday, April 10, 2015

Friday Night Conundrum

So, here we are, it is Friday night and I can't decide what to talk about. Originally, I was going to talk about marinated halibut, marinades in general, and an easy rice recipe. Although these all sounded good and things we will be sure to cover. I found that I was inspired by the weather to find something different to talk about. Even though I can make this recipe all year round, it of course is best served when it's cold and blustery outside.

Tonight, we are going to be making Apple and Butternut Squash Soup.

If the alarm bells are going off about how you can make this recipe, don't worry. I know so many times soup recipes seem complicated and for some reason, really intimidating. This is the exact reason that I created this blog -- to take that intimidation out of recipes so all food can be approachable no matter the skill level. Second, this recipe is so easy, takes very little time, and is darn easy.

Here is your payoff.

Although this is simple soup it packs a ton a flavor! In addition, this is something you will keep in your bag of tricks for when you want to cook for your family or have guests coming over for a dinner party.

How do we make it? Just like this.


We make a few adjustments, but do what suits your tastes the best.

Our big adjustment is using 1/4 tsp versus 1/2 tsp of cumin. As you may know from experience, cumin, while great, can be very, very overpowering and can take over a dish. We made that mistake once with a different butternut squash recipe. Remember, you can always add more, but it doesn't really work the other way around.

We also use a little less cayenne too. Some people are sensitive to spice/heat levels, so know your audience.

Here are a few more photos to give you an idea. By a few photos, I mean 3. Yes, that is all you need.

Here is the apple, butternut squash, garlic, and onion spending a little quality time together.

This is same picture as above after the liquid has been added. In case chicken broth isn't your thing, no problem -- you can always use turkey, vegetable, or any other broth that fits your needs. Also, I recommend using low sodium broth instead of the full salt versions. The reasons are pretty clear, but by the time you add all the broth with the full sodium your soup could be overly salted. Also, on that same note, for those who want to know what goes in our food, this is a great way to control how much goes in it.


After a spin in your favorite blender, food processor, or you can use a stick blender if you prefer, your soup is ready to go! I like to give the soup a little more time on the heat, so I put it back on the stove to make sure it is warmed through after its trip through the blender.

This is a filling soup that easily can be a meal, but it could always use a little crusty bread, a grilled cheese, or some roasted nuts (homemade of course). Don't worry, we'll get to all those recipes too.

Lastly, the recipe says to garnish with creme fraiche and chives. Truthfully, while this can be a nice touch for presentation, this soup doesn't need it.

`Nuff Said!


Thursday, April 9, 2015

Get your hands off my florets!

Tonight we are talking Cauliflower. I know there are a billion amazing things you can do with this versatile ingredient. For now, we are going to focus on a fast, flavorful application. I have plans to show what else you can do with cauliflower as we move along.

OK, tonight is roasted cauliflower. This application would also work with broccoli if that is more to your liking. Like our roasted carrots, the application is very much the same.
It starts with a 400 degree oven.

Feel free to use your choice of seasonings. I think I will use olive oil (1 1/2-2 tbps), salt (2 tsp), pepper (2 tsp), a little garlic powder (1/4 tsp), and to give this some complexity, paprika (2 tsp). You may need to adjust the seasoning level so be sure to taste as you go. Remember, it is easier to add seasoning. So, if you are unsure just add less.

Not only is paprika readily available, but it provides some really nice earthy, smokey notes to anything. We use it in a lot of dishes for that reason. If you are really into paprika there are a number of varieties that are sweet, spicy, earthy, a little floral, and a bit acidic almost. Don't worry, you can mellow those really easily, but it makes for some great flavor.

Where was I? 

Oh yeah, so you will cut the florets into golf ball size pieces...


You know what, forget that. I want this whole head on a silver lined platter!


Yes, we are going to roast the whole head of cauliflower. Here is your reward.


Remove the leafy, green bits and cut the stem so it sits flat on the tin foil. This will make it much easier to wrangle.

Time to practice being Picasso on your cauliflower canvas. Quick review, this is seasoned with olive oil, salt, pepper, paprika, garlic salt, and a bit of dried thyme.

After 45-60 minutes you have arrived at your destination. The best way to know if it is done is to just pierce the cauliflower with a knife. If the blade passes through easily, then success! If not, let it go a little more. Tip: If you think it is almost done, but you don't want to over cook it, just shut the oven off and leave it in till you are ready to serve. This does two things, you keep in the heat so it can cook and if it has to sit while you finish any other parts of your dinner it will still be hot.

A couple of things to keep in mind:

You could easily serve this a main course. Granted, the one we got was small but with a big enough head you could easily feed two people. Think about serving a nice salad with this as an accompaniment.

Once you open the cauliflower you may have to adjust the seasoning when you are ready to serve as the middle of the cauliflower could be bland.


Again, Cauliflower is infamous for being bland, so season liberally.

There are a ton of variations on this that you can do. In fact, ours uses freshly grated Parmesan cheese with about 15 minutes left to cook. Don't worry it won't burn, but just keep an eye on it.

Here are a couple of recipe links to help inspire you when making this
dish.

http://simmerandboil.cookinglight.com/2015/03/02/whole-roasted-cauliflower-recipe/

http://www.purewow.com/entry_detail/recipe/8821/Forget-florets--roast-the-whole-damn-cauliflower.htm