Okay, let me first say, if this isn't plainly obvious, recipe testing is
hard and it sure doesn't look as gritty on TV as it does in real life.
Surprise, right? No, no surprise for me either.
Anyway, I am still
working on this sauce with about 3 days to go. Plenty of time right? Maybe I should have started to work on my changes with 4 days to go, because that extra day would have made all the difference. :)
For those of you who are waiting patiently for a new post, have no fear! I have a ton of blog ideas that I am working on, but just need more time to develop them -- especially with recipe testing at the forefront. Plus, with life and being an adult getting in the way, my time has been limited this week. But I hope that changes soon.
So, stay tuned!
Wednesday, April 29, 2015
Monday, April 27, 2015
Tri-Tip Trifecta
Tri-tip is a great cut of beef that can offer you an inexpensive alternative to cuts such as rib-eye, new york strips, and other other more pricey cuts of meat. This is honestly one of my go-to cuts of meat that always delivers when you follow these simple steps.
Select your cut. Tri-tip comes in two forms as the whole roast or sliced down into steaks. Both of aforementioned applications have their purposes and honestly, you can't really go wrong. More often than not I will choose the roast. Why do you ask? The simple answer is forgiveness. You don't have apologize if you don't want to. I am talking about the forgiveness of the meat as it cooks. I am going to dive into this shortly, so I don't want to get too wrapped up in this right now. Oh, if you are looking for a money saving tip, and if you might find yourself using a lot of tri-tip, I would suggest buying the whole roast and either cooking it whole or breaking it down into steaks yourself. Side by side, the cost of you buying a roast and cutting it down or leaving it whole will be so much less than if you buy it shrink wrapped. However, if that is what you have available, it will do just fine. Cutting the roast as steaks is also great because they cook quick and can be marinated, so again, lots of ways to treat this cut of meat to make it flavorful and juicy.
Season your meat. You have heard me regularly remind you in these posts to season and/or adjust your seasoning, and this is no exception. Like with short ribs or steak, you will want to season more aggressively especially for the whole roast. If you are doing steaks, I would recommend reviewing my Party on the Barbie post for seasoning purposes. Okay, now that you know to season heavily with more than you need, what the heck do you season it with? Anything! Yes, the seasoning and spice options are limitless. Here is an example of a good blend of seasonings:
Salt
Fresh Ground Pepper
Garlic Powder
Paprika
Brown Sugar
Onion Powder
Honestly, you put this in a dish in the right amounts and I will eat that straight out of the container. Okay, well, maybe only a couple of teaspoons. :) Don't forget to check the flavor balance of your seasoning blend. If you think it needs something, you could easily add it if you like. Do you like your mix to be a little spicy? Add a pinch of cayenne or another ground pepper of your choice.
Believe it or not, we have actually been talking about marinade's brother from another mother, dry rub. Just like it sounds, we aren't apply any liquids to bring the seasoning together, we are just going to let seasoning naturally adhere to the exterior of the protein. By the way, this is another reason we want to season heavily because not all of it will stick. In case you are worried you can't master this great technique, you already have. That's right, we have already used this method in our Roasty Toasty Bird post.
Sealing the deal with finished internal temperature is the last key to our trifecta. For me, any steak or cut that isn't a slow cooker application should be medium rare between 130-135 degrees when the meat has rested. I will include pictures so you can see what that looks like. Use your thermometer, Luke. Best suggestion I can make is to go out and by a digital thermometer so you can get an accurate temperature every time. You don't need to take out a loan to get a good one unless you know you are going to use it enough to spend the extra coin. There are some ways you can check the doneness of your meat without a thermometer if you want. I will say, these methods are pretty accurate, but you will always get consistent results with a thermometer. Let me know if you are interested and we can talk about these other ways to check your meat.
As far as applying heat, I think the grill wins, however, you can do this on the stove top -- just make sure your kitchen is well ventilated so you don't smoke out your house and set off your fire alarm. Believe me, it doesn't make for a good time I can promise you that.
Alright, your grill should be at medium high heat and make sure to let your grill or pan get hot first. If you are using a pan the oil should be smoking (you're just looking for a wisp of smoke here, no big black cloud required). Use cast iron or a heavy-bottomed nonstick pan for the best results. Once you put the meat down, leave it alone! Sound familiar? Don't touch it! This is how you will get that amazing char, color, and caramelization. I would say at least 5 -7 minutes per side to get the delicious crust on the meat.
After you get the initial crust, you just want to apply enough heat to cook the roast through. So, turn the heat down and move it off direct heat if the burner or grill is still too hot -- and turn until the meat has consistent color on all sides. Pull your meat off the heat between 120-125 degrees, don't worry the meat will keep cooking once you remove it from the grill or stove. So you want to give it 10 minutes to rest and let those juices settle back into the meat, and while it rests you will get the final 5-10 degrees you need for that perfect medium rare temperature.
 Here is a finished, properly rested tri-tip roast. Once the roast comes out, tent it with foil to help hold in the carry-over heat.
 This is cooked to a perfect medium rare.
 Same shot, but a little closer. I think this photo speaks for itself!
Select your cut. Tri-tip comes in two forms as the whole roast or sliced down into steaks. Both of aforementioned applications have their purposes and honestly, you can't really go wrong. More often than not I will choose the roast. Why do you ask? The simple answer is forgiveness. You don't have apologize if you don't want to. I am talking about the forgiveness of the meat as it cooks. I am going to dive into this shortly, so I don't want to get too wrapped up in this right now. Oh, if you are looking for a money saving tip, and if you might find yourself using a lot of tri-tip, I would suggest buying the whole roast and either cooking it whole or breaking it down into steaks yourself. Side by side, the cost of you buying a roast and cutting it down or leaving it whole will be so much less than if you buy it shrink wrapped. However, if that is what you have available, it will do just fine. Cutting the roast as steaks is also great because they cook quick and can be marinated, so again, lots of ways to treat this cut of meat to make it flavorful and juicy.
Season your meat. You have heard me regularly remind you in these posts to season and/or adjust your seasoning, and this is no exception. Like with short ribs or steak, you will want to season more aggressively especially for the whole roast. If you are doing steaks, I would recommend reviewing my Party on the Barbie post for seasoning purposes. Okay, now that you know to season heavily with more than you need, what the heck do you season it with? Anything! Yes, the seasoning and spice options are limitless. Here is an example of a good blend of seasonings:
Salt
Fresh Ground Pepper
Garlic Powder
Paprika
Brown Sugar
Onion Powder
Honestly, you put this in a dish in the right amounts and I will eat that straight out of the container. Okay, well, maybe only a couple of teaspoons. :) Don't forget to check the flavor balance of your seasoning blend. If you think it needs something, you could easily add it if you like. Do you like your mix to be a little spicy? Add a pinch of cayenne or another ground pepper of your choice.
Believe it or not, we have actually been talking about marinade's brother from another mother, dry rub. Just like it sounds, we aren't apply any liquids to bring the seasoning together, we are just going to let seasoning naturally adhere to the exterior of the protein. By the way, this is another reason we want to season heavily because not all of it will stick. In case you are worried you can't master this great technique, you already have. That's right, we have already used this method in our Roasty Toasty Bird post.
Sealing the deal with finished internal temperature is the last key to our trifecta. For me, any steak or cut that isn't a slow cooker application should be medium rare between 130-135 degrees when the meat has rested. I will include pictures so you can see what that looks like. Use your thermometer, Luke. Best suggestion I can make is to go out and by a digital thermometer so you can get an accurate temperature every time. You don't need to take out a loan to get a good one unless you know you are going to use it enough to spend the extra coin. There are some ways you can check the doneness of your meat without a thermometer if you want. I will say, these methods are pretty accurate, but you will always get consistent results with a thermometer. Let me know if you are interested and we can talk about these other ways to check your meat.
As far as applying heat, I think the grill wins, however, you can do this on the stove top -- just make sure your kitchen is well ventilated so you don't smoke out your house and set off your fire alarm. Believe me, it doesn't make for a good time I can promise you that.
Alright, your grill should be at medium high heat and make sure to let your grill or pan get hot first. If you are using a pan the oil should be smoking (you're just looking for a wisp of smoke here, no big black cloud required). Use cast iron or a heavy-bottomed nonstick pan for the best results. Once you put the meat down, leave it alone! Sound familiar? Don't touch it! This is how you will get that amazing char, color, and caramelization. I would say at least 5 -7 minutes per side to get the delicious crust on the meat.
After you get the initial crust, you just want to apply enough heat to cook the roast through. So, turn the heat down and move it off direct heat if the burner or grill is still too hot -- and turn until the meat has consistent color on all sides. Pull your meat off the heat between 120-125 degrees, don't worry the meat will keep cooking once you remove it from the grill or stove. So you want to give it 10 minutes to rest and let those juices settle back into the meat, and while it rests you will get the final 5-10 degrees you need for that perfect medium rare temperature.
Sunday, April 26, 2015
Recipe Testing-Oh My!
Yes, it's probably no surprise that I spent most of the day testing and working on this sauce creation. I think I have roasted about 20 bell peppers in the course of 48 hours or so! This is a labor of love, but with a share of head scratching mixed in. I've included a couple of photos for you to enjoy while I continue on my quest.


On the left you'll see the base components of my sauce; and on the right you'll see one of the two versions of the red pepper sauces I made today.
Are we making progress on this? Yes, I believe we are on the right path. Do we need to work out some kinks and try to make sense of what we have done so far? Once again, yes -- yes we must spend some time mastering the mechanics of this sauce until I get it just right. I promise that I will share the recipe when it is fully completed.
Do I have anything else forthcoming? Yes! Upcoming posts will include grilled tri-tip roast, plus a how-to on mangoes and roasted garlic. Curious? I hope so!
Stay tuned for all this and more!
Saturday, April 25, 2015
Recipe Test Launch
Today I began recipe testing for a creation that I hope to complete in a little less than 36 hours time. Plenty of time, right? I think so too. Alright, so as you can imagine, having to scrutinize every part of your recipe is both rewarding and a little tough. However, the reward could be significant. Let's face it, the chance to have a winning recipe is awesome, but being able to add this to my recipe arsenal has big benefit as well. I already know that this recipe will be something I go back to again and again.
I am going to share a few photos, but no recipe as of yet because I am still working out a few, well, issues. Yup, this is a good reminder that mistakes will happen when it comes to food because that is the price we must pay to be amateur foodies. Or, we can heed these very famous words courtesy of Julia Child: "Learn how to cook -- try new recipes, learn from your mistakes, be fearless and above all have fun."
 8 roasted red bell peppers.
 This is the pepper de la resistance.
 Here is the first test of the recipe. I posted this photo so you could see what I was working on earlier.
.jpg) One of the first test photos. Came out well, but what did it lack? Well, a little bit everything as it turned out. It just didn't have any punch and there are ingredients that I wanted to highlight that weren't coming through in the flavor of the sauce. It was time to go back to create a second batch of the sauce with some adjustments.
One of the first test photos. Came out well, but what did it lack? Well, a little bit everything as it turned out. It just didn't have any punch and there are ingredients that I wanted to highlight that weren't coming through in the flavor of the sauce. It was time to go back to create a second batch of the sauce with some adjustments.

 This is sauce number two. Any guesses as to what the problem is here? The flavor was on point this time, but in order to make the adjustments I needed the sauce suffered in the color department. Needless to say, there is work to be done to return the sauce to it's color of glory.
Tomorrow is a new day, but in the name of flavor, deliciousness, and well, just plain fun -- more peppers will face a certain doom.
More updates to come. Stay Tuned!
I am going to share a few photos, but no recipe as of yet because I am still working out a few, well, issues. Yup, this is a good reminder that mistakes will happen when it comes to food because that is the price we must pay to be amateur foodies. Or, we can heed these very famous words courtesy of Julia Child: "Learn how to cook -- try new recipes, learn from your mistakes, be fearless and above all have fun."
Tomorrow is a new day, but in the name of flavor, deliciousness, and well, just plain fun -- more peppers will face a certain doom.
More updates to come. Stay Tuned!
Thursday, April 23, 2015
Taking My Teriyaki Back to you "Babe"
This salmon will knock your socks off! Yup, simple, satisfying, and spectacular salmon. Of all the salmon we have cooked, which we try to have at least once a week, this was one of the best adaptions that we have executed to date. Salmon is rich, has tons of body, and can really take on a lot of seasonings.
 This salmon features a light teriyaki glaze with some added twists to make it my own.
I am not ashamed to say that grabbing a bottle of soy or Teriyaki sauce from the store in order to save yourself a little time cooking is something I am all for -- that way you can have a little more time to enjoy the important things in life. As I have stated, I am a big proponent for trying to make as much as you can from home but I have nothing against the benefits of what is available in the store. The only downside to using what you can find in the store is that some store bought sauces tend to be overpowering and detract from the flavor you are trying to enhance. The great news is there are very simple, easy, and clever ways to fix that.
This all began at our local fish counter at our favorite store, where we saw all kinds of pre-marinated fish and various quick dinner options, as well as the fresh salmon we usually buy. We eyed our potential purchase warily as we were unsure of a marinating a strong flavored fish that tastes so good on its own. However, we had recently discovered that some of the combinations from a marinated fish or protein (no matter how strange they may sound) delivered great flavor. These flavor profiles included a variety of options, such as orange Dijon, or lemon and rosemary herb. Sound good, right? You're right about that -- because these marinades and sauces were perfectly paired combos with a number of different fish, including salmon.
Unfortunately if a marinade too strong flavor-wise for the protein you're working with, it is very easy to lose the flavor entirely as your meal is overwhelmed by the salt, the spice level, or other elements in the marinade. This can result in the fish or protein being over-saturated with the flavors of the marinade, such as orange and mustard, leaving your unable to enjoy the fish or anything else you might serve with it. That would be a terrible marinade experience!
This post is meant to help you see what you can do to resolve this dilemma. The key is to remember you don't have to use a huge amount of the strong flavored marinades, and sauces from a jar when working to develop your own Orange Dijon or an Asian inspired fish flavor profile -- you're not required to use only what is in those jars.
So, we found this glaze we liked and because it was something that was used already to marinate various fishes and meat by the meat department, which often helped the store move the last few fillets of fish or a few extra chicken breasts the staff will marinate the items they need to sell in order to make room for something else. The good news is that this marinade and others like it are readily available at the fish counter and meat department for you to sample first before committing to using it on your fish, pork, beef, etc., to see if it would be worth buying rather than spending the money on a jar of sauce that you know you probably won't like. Also, in a lot of large grocery stores, we frequent Whole Foods and New Seasons, you can buy sample size containers for little to no cost if you ask the grocery clerk what you're using it for or what you are trying to do.
Now that we had the sauce, it was time to play "Let's Make a New Glaze." You can do this a lot of ways, for us, we went with simple additions, including olive oil, dried basil and oregano, a little fresh ground pepper, and lime juice. The oil is a great way to thin your glaze if it appears to thick. Adding dried herbs can really enhance the flavors of the fish in this case, but dried herbs work in anything! We admittedly love black pepper, not only because nothing beats fresh ground pepper, but it can really help if you are trying to counterbalance salt or richness in any dish. As you can imagine, the lime juice is used for the same reasons, to give the fish a perfect note of citrus undertone and to provide a perfect counterpoint to the salt, balancing these flavors exceptionally well. Again, it will help keep your glaze thinner and easier to apply by using the oil & lime juice into the marinade.
 Here is the thinned out glaze with olive oil, pepper, dried basil and oregano, and a little lime juice. In case you are wondering why I didn't mention salt that is because the teriyaki has plenty of salt already and likely salt won't be need. If you think you do need more salt, first add only a small amount of salt as it possibly could grow too salty very quickly. Be, sure to taste your glaze before you apply it to the fish, and if the seasonings are too strong or not strong enough, adjust as needed before applying to salmon. Remember, you can always add, but subtracting in this case gets difficult.
 Good Evening, This is your Captain, speaking from the Grill Deck.
"We are cruising at about 400 hundred degrees for about 15-20 minutes. As we make our descent, please remember to check your fish as carryover heat will be applied and your fish will continue to cook until its arrival to the plate. We thank you for flying Salmon Airlines, and thank you for letting us serve you at medium rare.
Hope you enjoy this great dish!
I am not ashamed to say that grabbing a bottle of soy or Teriyaki sauce from the store in order to save yourself a little time cooking is something I am all for -- that way you can have a little more time to enjoy the important things in life. As I have stated, I am a big proponent for trying to make as much as you can from home but I have nothing against the benefits of what is available in the store. The only downside to using what you can find in the store is that some store bought sauces tend to be overpowering and detract from the flavor you are trying to enhance. The great news is there are very simple, easy, and clever ways to fix that.
This all began at our local fish counter at our favorite store, where we saw all kinds of pre-marinated fish and various quick dinner options, as well as the fresh salmon we usually buy. We eyed our potential purchase warily as we were unsure of a marinating a strong flavored fish that tastes so good on its own. However, we had recently discovered that some of the combinations from a marinated fish or protein (no matter how strange they may sound) delivered great flavor. These flavor profiles included a variety of options, such as orange Dijon, or lemon and rosemary herb. Sound good, right? You're right about that -- because these marinades and sauces were perfectly paired combos with a number of different fish, including salmon.
Unfortunately if a marinade too strong flavor-wise for the protein you're working with, it is very easy to lose the flavor entirely as your meal is overwhelmed by the salt, the spice level, or other elements in the marinade. This can result in the fish or protein being over-saturated with the flavors of the marinade, such as orange and mustard, leaving your unable to enjoy the fish or anything else you might serve with it. That would be a terrible marinade experience!
This post is meant to help you see what you can do to resolve this dilemma. The key is to remember you don't have to use a huge amount of the strong flavored marinades, and sauces from a jar when working to develop your own Orange Dijon or an Asian inspired fish flavor profile -- you're not required to use only what is in those jars.
So, we found this glaze we liked and because it was something that was used already to marinate various fishes and meat by the meat department, which often helped the store move the last few fillets of fish or a few extra chicken breasts the staff will marinate the items they need to sell in order to make room for something else. The good news is that this marinade and others like it are readily available at the fish counter and meat department for you to sample first before committing to using it on your fish, pork, beef, etc., to see if it would be worth buying rather than spending the money on a jar of sauce that you know you probably won't like. Also, in a lot of large grocery stores, we frequent Whole Foods and New Seasons, you can buy sample size containers for little to no cost if you ask the grocery clerk what you're using it for or what you are trying to do.
Now that we had the sauce, it was time to play "Let's Make a New Glaze." You can do this a lot of ways, for us, we went with simple additions, including olive oil, dried basil and oregano, a little fresh ground pepper, and lime juice. The oil is a great way to thin your glaze if it appears to thick. Adding dried herbs can really enhance the flavors of the fish in this case, but dried herbs work in anything! We admittedly love black pepper, not only because nothing beats fresh ground pepper, but it can really help if you are trying to counterbalance salt or richness in any dish. As you can imagine, the lime juice is used for the same reasons, to give the fish a perfect note of citrus undertone and to provide a perfect counterpoint to the salt, balancing these flavors exceptionally well. Again, it will help keep your glaze thinner and easier to apply by using the oil & lime juice into the marinade.
"We are cruising at about 400 hundred degrees for about 15-20 minutes. As we make our descent, please remember to check your fish as carryover heat will be applied and your fish will continue to cook until its arrival to the plate. We thank you for flying Salmon Airlines, and thank you for letting us serve you at medium rare.
Hope you enjoy this great dish!
Wednesday, April 22, 2015
Putting the recipe where your mouth is
Okay, tonight is less about an active recipe, but more of a story. Yes, that means tonight Patrick's Table Fare becomes Patrick's Table Story Hour. Good news, this story won't be actually be an hour, but you get the idea.
Alright, so last week one of my bosses came to me and said, "Hey, there is a recipe contest with a local restaurant group that maybe you should think about entering." Of course my interest was immediately piqued, but my initial thought was where was I going to come up with an unique enough spin that I could garner some attention. I thought my chance was quickly dashed when I realized a bulk of the recipes I do only have minor changes, but may not provide enough complexity to make the dish my own. So, it was no surprise when I started talking myself out of the possibility that I could even create something that would work.
Oh, what would I get out of this if the recipe won? The winning recipe is featured for 6 weeks on the menus of a local restaurant group in all their restaurants. Sweet, right?!
I digress, back to my story. Even though I had decided I couldn't come up with anything, my brain continued to search and seek through my internal database. Alas, I still couldn't come with anything that could be identifiably my own. My in house copy editor and I started chewing over some more ideas to make sure I wasn't limiting myself. We kicked around a few more ideas including the roasted pepper sauce that I make that you can find my Party on the Barbie post, but I knew that wasn't going to be unique enough. I started to wonder if I could find a way to give that sauce a notable twist that would turn some heads. I suddenly remembered this time where I combined some left over red pepper sauce and some left over homemade pesto in a pinch to stretch both the sauces. As it turned out, the flavor of the pesto and red pepper was different and could be well suited for this application, but the color of the sauce was anything but appealing. So, to keep you reading, I willjust describe the color of the sauce as that of pate. See the problem? Now the wheels were turning since I had a flavor profile, but I had to make sure the sauce's color would be appealing. How could I make this work, I wondered. Then it hit me, maybe I could incorporate fresh basil leaves with the red peppers and follow the same premise of how I make the sauce normally.
Off to the kitchen I went and as luck would have it, I had enough ingredients in the fridge to make a very basic batch of my new creation. What did I discover to my own surprise? The sauce worked. Boom! Just like that, I had my unique twist that I could apply to a dish that is recognizable but would march to the beat of it's own drum.
Now, the fun part. Now I need to test the sauce until the flavors balance properly, then I can figure out how to bring it all together. Anyone ready to roast some more red peppers? I will post a complete recipe once it is done, but there will be updates coming soon as the deadline is less than two weeks away! Here we go!
Monday, April 20, 2015
The Missing Post-Man
Good evening my faithful readers! There is a post that is in progress, but it is currently marinating and won't be ready till tomorrow. Until then, don't forget the salt and pepper! Stay tuned!
Magical Mystery Tour of Marinades
Besides seasoning your food well, one of the best ways to apply flavor is to marinate. The great thing is you can marinate vegetables, fishes, meats, heck, even some fruits. Yes, you can marinate fruits & vegetables -- but we will cover both later down the road. Depending on the marinade and how much flavor you either want or have time to achieve, a marinade can flavor meat or other items in as little as 30 minutes or up to 24 hours.
Since it's almost summer and for most that is the main grilling season, we will now turn our attention to the humble grilled chicken. One of the biggest problems with chicken is that it can be really bland. Plus, if you season the outside too much and apply too much heat to the chicken you may burn the outside, leaving raw chicken, or it could intensify the seasoning you used -- making it too spicy, too salty or too sweet to enjoy. This is where marinating comes in. You can get some of those same flavors to penetrate deep into flesh of the meat simply by placing it in the marinade for a little while.
What sort of things can you use in a marinade? Truthfully, the options are endless for what you can use. Let me give you a few examples. Don't use this list as a recipe mind you, but just pick some items that sound good together.
For, Beef, Pork, Chicken:
Alright, now that we have covered the basics, lets talk application. Just throw everything in a bag and swish around until the seasonings dissolve in the liquid. If you don't get it all don't worry, you will get your chance to combine it all. Throw your protein in the bag with the marinade, seal it, set on a plate, and turn every 15 minutes for a 30-minute marinade or every couple of hours for a lengthier soak, which makes sure every part of the chicken gets covered. Oh, we are using skin on, bone-in chicken breasts, but you can use any of your favorite chicken pieces as well.
You can cook these with any application really, but I suggest the grill or oven. This allows you to make sure you can secure a proper, elegant cook and will help keep the meat moist.
Make sure you check the cooking times for the type of chicken you have selected, as these can vary.
For us, a bone-in, skin-on chicken breast will take about 30 minutes on the grill or in our oven. Remember to pull your chicken off of the heat a little bit early to let it finish cooking without drying out. Properly cooked chicken after resting should have an internal temperature of 165 degrees. I usually pull our chicken off the grill or out of the oven at about 155 - 160 degrees as it will finish during the rest period. Feel free to use a digital thermometer to check the internal temperature, or after it has rested go ahead and cut into the chicken and make sure you don't see any pink and that the juices run clear.
 After about 5-7 minutes on the grill your chicken should start to look like this.
 You can also serve the breast off the bone if you prefer, which makes for a really nice presentation.
 Chicken finished with a nice salad of arugula, green apples, spinach, mushrooms, and homemade balsamic of course.
Since it's almost summer and for most that is the main grilling season, we will now turn our attention to the humble grilled chicken. One of the biggest problems with chicken is that it can be really bland. Plus, if you season the outside too much and apply too much heat to the chicken you may burn the outside, leaving raw chicken, or it could intensify the seasoning you used -- making it too spicy, too salty or too sweet to enjoy. This is where marinating comes in. You can get some of those same flavors to penetrate deep into flesh of the meat simply by placing it in the marinade for a little while.
What sort of things can you use in a marinade? Truthfully, the options are endless for what you can use. Let me give you a few examples. Don't use this list as a recipe mind you, but just pick some items that sound good together.
For, Beef, Pork, Chicken:
- Rosemary -- Just remove the leaves from the stem & place in your plastic bag or bowl for the marinade, lightly crushing the stem to release that essence of flavor from the herb, and toss that into the marinade as well.
- Salt and Pepper -- Always use salt & pepper in a marinade, seasoning according to your tastes.
- Vinegar -- A splash of regular balsamic, apple cider, and champagne vinegar can give some nice notes of acidity and sweetness to a marinade.
- Crushed Garlic -- I recommend just peeling a few cloves, smashing so the flesh starts to open and the oils will release, before tossing the cloves into the marinade. Use as many cloves as suits your tastes or the flavor you're looking to achieve.
- Oil -- Some types of cooking oils will work well for any marinade, such as olive, canola or grape seed oil.
- Spices -- Anything will work, but I like paprika, garlic powder, onion powder, dried herbs and various spice mixtures depending on the type of meat you may be marinating.
- Cilantro
- Garlic
- Dried Herbs (Basil and Oregano)
- Salt and Pepper
- A splash of wine
- Oil
- Citrus -- Note: When applying citrus, make sure you use enough to get a little flavor and only marinate for a short period, making sure not to leave your fish in the marinade too long as too much citrus can cook your fish -- hello ceviche! We aren't covering that in this post, but instead we'll leave that one for another day. I always recommend finishing fish with some kind of citrus for maximum flavor, or if you feel your fish is under-seasoned.
Alright, now that we have covered the basics, lets talk application. Just throw everything in a bag and swish around until the seasonings dissolve in the liquid. If you don't get it all don't worry, you will get your chance to combine it all. Throw your protein in the bag with the marinade, seal it, set on a plate, and turn every 15 minutes for a 30-minute marinade or every couple of hours for a lengthier soak, which makes sure every part of the chicken gets covered. Oh, we are using skin on, bone-in chicken breasts, but you can use any of your favorite chicken pieces as well.
You can cook these with any application really, but I suggest the grill or oven. This allows you to make sure you can secure a proper, elegant cook and will help keep the meat moist.
Make sure you check the cooking times for the type of chicken you have selected, as these can vary.
For us, a bone-in, skin-on chicken breast will take about 30 minutes on the grill or in our oven. Remember to pull your chicken off of the heat a little bit early to let it finish cooking without drying out. Properly cooked chicken after resting should have an internal temperature of 165 degrees. I usually pull our chicken off the grill or out of the oven at about 155 - 160 degrees as it will finish during the rest period. Feel free to use a digital thermometer to check the internal temperature, or after it has rested go ahead and cut into the chicken and make sure you don't see any pink and that the juices run clear.
Sunday, April 19, 2015
What The French Toast?!
It is Sunday morning breakfast, and yes, we are talking french toast! True, you can get french toast anywhere, but nothing beats a super easy, rich, and flavorful homemade french toast. I add something that gives this french toast a special twist. Ready, let's go!
This recipe is meant to serve 2-3 people, so adjust accordingly.
Recipe:
4-6 slices of 1 inch thick bread slices (we usually use about 1/2 of a loaf, but we will talk about bread below)
3 Eggs
1/2 - 3/4 cups of milk
A pinch of salt
2-3 teaspoons of lemon zest
I use a cast iron pan for my french toast, but you can also use a heavy-bottomed nonstick pan, an electric griddle or a griddle pan instead if you prefer.
Oh, wait, did I say lemon zest? Yes, lemon zest! As we have talked about before lemon zest brings a nice citrus note and a touch of acidity to rich or filling foods. Want a refresher about how we can lemon zest? Check my "Batter Up" blog post. French toast is a rich, sweet dish, which is what you want -- and the lemon zest is a nice way to cut through the richness to provide a little relief to your palate. That's why lemon zest is the way to go.
Next is the important task of selecting the bread that you will lovingly devour when this is finished. First up, try to stay away from pre-sliced packaged bread that is on every corner of of shopping grocery store aisle. The aforementioned sliced bread won't stand up to taking on our egg custard that we need in order for this recipe and it is a crucial element of a successful fresh toast. Also, a lot of those store breads can bring a funny flavor to the party or you may end up with nut studded french toast, which I will say won't make, if I may, "good eats."
Okay, what should you be looking for in your bread based companion? Try a loaf of fresh french bread from your local grocery story or bakery, as well as brioche, challah bread, or sourdough bread will do very well here. We are choosing these fresh bread options for a couple of reasons, unlike many national brand breads you can often find bread options with a lot fewer unnecessary ingredients, you get to slice the bread at the desired thickness level you want to use for your french toast (versus pre-sliced breads), and lastly -- the interior layer within these breads will gladly and willing soak up the custardy goodness you are putting forth with your french toast recipe.
Picture time? Yes, I think so!
 This is what we ate. Oh, so good!
 "My name is Bread, Challah Bread." We use challah bread for our french toast recipe, and this is what it looks like. Yes, the end is missing because tasting and quality control is so important!!
 Eggs and lemon zest getting together.
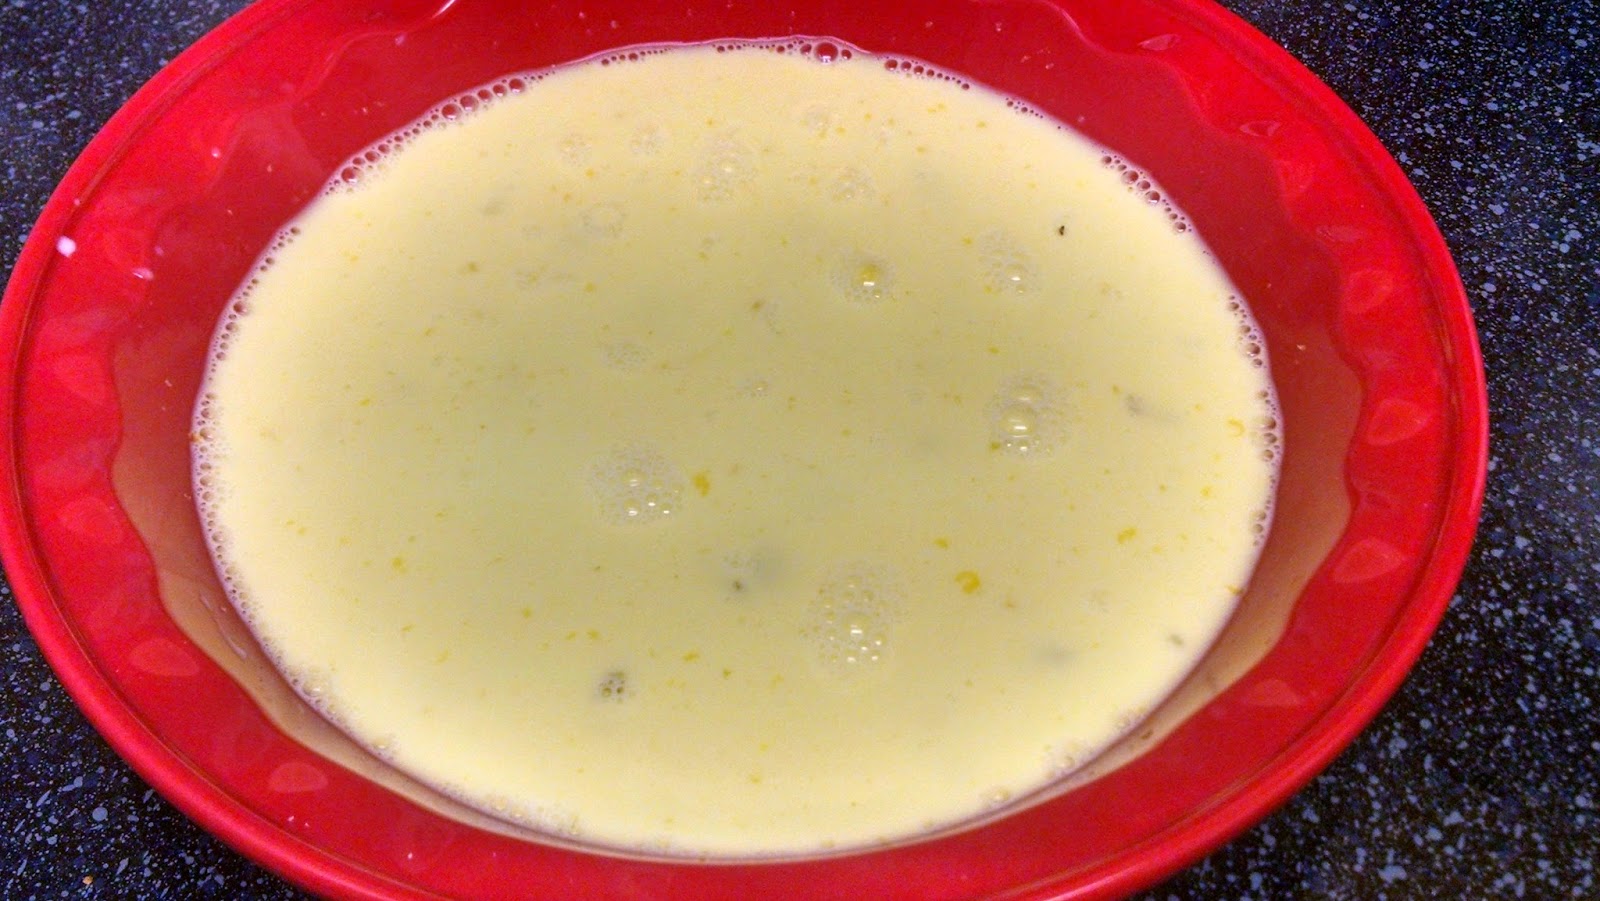
Captain, we have custard in sight.
 The bread is getting its soak on. I would say about 60 seconds or so per side in order for the custard to absorb all the way through.
 Here is everything you will need to make this happen all staged and ready to go. Consider this my Model FT assembly line for french toast.
 This photo shows the golden brown deliciousness we want to achieve. Cook your bread on the cast iron "griddle" for a few minutes per side on medium heat until you get this color on both sides of the bread. When you first put the bread in the pan make sure your pan is hot or you will end up with soggy, mushy french toast.
 I will let this photo sink in......You will never need french toast from an I-Pancake restaurant again.
Success! What a way to start your weekend day! :)
This recipe is meant to serve 2-3 people, so adjust accordingly.
Recipe:
4-6 slices of 1 inch thick bread slices (we usually use about 1/2 of a loaf, but we will talk about bread below)
3 Eggs
1/2 - 3/4 cups of milk
A pinch of salt
2-3 teaspoons of lemon zest
I use a cast iron pan for my french toast, but you can also use a heavy-bottomed nonstick pan, an electric griddle or a griddle pan instead if you prefer.
Oh, wait, did I say lemon zest? Yes, lemon zest! As we have talked about before lemon zest brings a nice citrus note and a touch of acidity to rich or filling foods. Want a refresher about how we can lemon zest? Check my "Batter Up" blog post. French toast is a rich, sweet dish, which is what you want -- and the lemon zest is a nice way to cut through the richness to provide a little relief to your palate. That's why lemon zest is the way to go.
Next is the important task of selecting the bread that you will lovingly devour when this is finished. First up, try to stay away from pre-sliced packaged bread that is on every corner of of shopping grocery store aisle. The aforementioned sliced bread won't stand up to taking on our egg custard that we need in order for this recipe and it is a crucial element of a successful fresh toast. Also, a lot of those store breads can bring a funny flavor to the party or you may end up with nut studded french toast, which I will say won't make, if I may, "good eats."
Okay, what should you be looking for in your bread based companion? Try a loaf of fresh french bread from your local grocery story or bakery, as well as brioche, challah bread, or sourdough bread will do very well here. We are choosing these fresh bread options for a couple of reasons, unlike many national brand breads you can often find bread options with a lot fewer unnecessary ingredients, you get to slice the bread at the desired thickness level you want to use for your french toast (versus pre-sliced breads), and lastly -- the interior layer within these breads will gladly and willing soak up the custardy goodness you are putting forth with your french toast recipe.
Picture time? Yes, I think so!
Captain, we have custard in sight.
Success! What a way to start your weekend day! :)
Saturday, April 18, 2015
Dressing Dilemma
A couple of months ago while I was the store, I began the tedious hunt for my favorite salad dressing, balsamic vinaigrette. Looking for a vinaigrette went about as well as winning the lottery has gone for me. Yeah, that explains it all, right? I look down the aisle and all I can see are bottles with faces of roman characters, labels where all the money goes to charity, celebrity chef's dressings, and a simple label for a store off-brand dressing.
Yet, most of these bottles had one common problem, the number of ingredients doesn't make sense! One variety had 17 ingredients in it! Are you kidding? I thought to myself. I scowled at the Roman God on my way out of the aisle, checked out, and set out to make a dressing that would cost less than and rival any store bought bottle, and would be assuredly better for me than 11 extra ingredients I didn't need. I am happy to say that I won't ever need to buy balsamic dressing from the store any time soon.
How do you make this delicious concoction? Follow this recipe:
Don't have a blender? No problem! You can do this by hand pretty easily but it can take a bit longer for all the ingredients to emulsify. Just add all the ingredients, but slowly drizzle the oil in a small steady stream and whisk until it starts to come together. The visual cues will be clear, when the dressing begins to come together the color will begin to change as you whisk, and lastly, you will notice that the mixture thickens.
I included the visual cues because so often recipes don't do an adequate job describing what it should look like, smell like, feel like, and so on. That is one thing in lots of recipes that drives me crazy.
Okay, time for a couple of photos.
 Here is the finished balsamic in a mason jar. Just put a lid on it and it can hang out on the counter and be perfectly stable.

Here is another look at the mason jar from a different angle. This yields around a cup and a half of dressing.
Make sure you taste this because sometimes you need to adjust the seasoning. Try using a piece of lettuce dipped in the dressing to check the level of seasoning, or a piece of bread will do nicely. Sometimes I add a splash of lime juice for a fruity undertone. Remember, if the balsamic seems super strong you can thin it with a little more olive oil, or vice-versa if you aren't getting that balsamic note. As with most of my recipes, adjust accordingly.
Looking for a new twist for how to use this vinaigrette? Try making a baked potato with a little sour cream, and finish with a drizzle of vinaigrette and some salt and pepper. Truthfully this is one of my favorite ways to use the balsamic. You could also use this for a slaw if you aren't a fan of mayo based dressings or just a regular potato salad. Again, you can use this for anything.
Yet, most of these bottles had one common problem, the number of ingredients doesn't make sense! One variety had 17 ingredients in it! Are you kidding? I thought to myself. I scowled at the Roman God on my way out of the aisle, checked out, and set out to make a dressing that would cost less than and rival any store bought bottle, and would be assuredly better for me than 11 extra ingredients I didn't need. I am happy to say that I won't ever need to buy balsamic dressing from the store any time soon.
How do you make this delicious concoction? Follow this recipe:
- 6 tablespoons balsamic vinegar
- 2 ½ Tablespoon Dijon mustard
- 2 garlic cloves, minced
- ¾-1 cup olive oil
- Salt and freshly ground pepper
Add all ingredients above to the blender as well as 1/4 cup of the olive oil, reserving 1/2 - 3/4 of the olive oil. I have a Vitamix blender, but use
what you have at hand. Once you've incorporated the first 1/4 of olive oil and the other ingredients, begin slowly drizzling the remaining olive oil into the blender until all the ingredients are emulsified.
Don't have a blender? No problem! You can do this by hand pretty easily but it can take a bit longer for all the ingredients to emulsify. Just add all the ingredients, but slowly drizzle the oil in a small steady stream and whisk until it starts to come together. The visual cues will be clear, when the dressing begins to come together the color will begin to change as you whisk, and lastly, you will notice that the mixture thickens.
I included the visual cues because so often recipes don't do an adequate job describing what it should look like, smell like, feel like, and so on. That is one thing in lots of recipes that drives me crazy.
Okay, time for a couple of photos.
Here is another look at the mason jar from a different angle. This yields around a cup and a half of dressing.
Make sure you taste this because sometimes you need to adjust the seasoning. Try using a piece of lettuce dipped in the dressing to check the level of seasoning, or a piece of bread will do nicely. Sometimes I add a splash of lime juice for a fruity undertone. Remember, if the balsamic seems super strong you can thin it with a little more olive oil, or vice-versa if you aren't getting that balsamic note. As with most of my recipes, adjust accordingly.
Looking for a new twist for how to use this vinaigrette? Try making a baked potato with a little sour cream, and finish with a drizzle of vinaigrette and some salt and pepper. Truthfully this is one of my favorite ways to use the balsamic. You could also use this for a slaw if you aren't a fan of mayo based dressings or just a regular potato salad. Again, you can use this for anything.
Friday, April 17, 2015
Not Your Mama's Corn
It is that time of the year, time for corn! Like so many things, corn is super versatile and can be a star in any dish. Of all the variations on how to cook corn I wanted to talk about grilled corn. Grilling corn looks awesome and provides an amazing, complex flavor that is a great compliment for any meal.
Who doesn't love perfectly charred, smokey sweet kernels of corn that pop in your mouth when you bite in? Oh, did I mention that we are putting the corn straight on the grill with the husk removed? Yes, this isn't your Mama's grilled corn after all.
 I think this picture speaks for itself.
The application of this recipe is super simple:
Remove the corn from its husks.
Place corn on the grill with no oil or seasoning (we will fix this later) on medium to medium high heat. Allow the corn to get some char and color then rotate about a1/4 turn. Once you have charred all sides (about 4 quarter turns) you will be ready to move on.
Make a seasoning packet out of foil with enough space in the foil pouch to place the corn inside. You could use salt, pepper, butter, olive oil, paprika, a little chili pepper (if you want), and a little bit of brown sugar.
Place the charred corn in this packet and wrap it up tight. setting it aside for 10 minutes or so. You are actually finishing the corn by steaming it in the foil packet with the seasoning. As you are ready to serve, roll the corn in the melted seasoning mix until it is coated to make sure it has plenty of flavor.

Corn On!
 Here is what you should achieve after about 15 minutes. May take a little longer depending on your grill and how much heat has been lost by checking on the corn.
That is it. You are done making some amazing corn! This will be a recipe you go to again and again.
How do you know the corn is ready to be pulled off the gril and wrapped in foil? The kernels will start to separate from each other a little bit and that is your clue it is time to wrap the corn in foil. Be sure not to cook the corn too long after you see the kernels pull away or you will have mushy corn and that could be your Mama's corn.
Boom!
Okay, I hope you enjoy and soon we will be on to our next.......did you really think I would leave you without a finished plate? If so, well then congratulations you have earned yourself more photos. If not, well, take better notes as home cooks can be creatures of habit, but I digress.
 This photos is because, well, I enjoy a good steak. Want a refresher on cooking steak essentials? Review the "Party on The Barbie" blog post.
 Here is a finished plate. Now I am done. Oh, just one last thing, I am going to show you how to take this roasted corn to another level in a future post.
Who doesn't love perfectly charred, smokey sweet kernels of corn that pop in your mouth when you bite in? Oh, did I mention that we are putting the corn straight on the grill with the husk removed? Yes, this isn't your Mama's grilled corn after all.
The application of this recipe is super simple:
Remove the corn from its husks.
Place corn on the grill with no oil or seasoning (we will fix this later) on medium to medium high heat. Allow the corn to get some char and color then rotate about a1/4 turn. Once you have charred all sides (about 4 quarter turns) you will be ready to move on.
Make a seasoning packet out of foil with enough space in the foil pouch to place the corn inside. You could use salt, pepper, butter, olive oil, paprika, a little chili pepper (if you want), and a little bit of brown sugar.
Place the charred corn in this packet and wrap it up tight. setting it aside for 10 minutes or so. You are actually finishing the corn by steaming it in the foil packet with the seasoning. As you are ready to serve, roll the corn in the melted seasoning mix until it is coated to make sure it has plenty of flavor.
Corn On!
That is it. You are done making some amazing corn! This will be a recipe you go to again and again.
How do you know the corn is ready to be pulled off the gril and wrapped in foil? The kernels will start to separate from each other a little bit and that is your clue it is time to wrap the corn in foil. Be sure not to cook the corn too long after you see the kernels pull away or you will have mushy corn and that could be your Mama's corn.
Boom!
Okay, I hope you enjoy and soon we will be on to our next.......did you really think I would leave you without a finished plate? If so, well then congratulations you have earned yourself more photos. If not, well, take better notes as home cooks can be creatures of habit, but I digress.
Thursday, April 16, 2015
Rice On, Rice Off
Rice, a staple food loved by many, but intimidating to many who try to make this soft, pillowy, starchy goodness. As strange as this may sound, rice was one of my most feared culinary enemies.
I had never tried to make it as all I had ever heard were horror stories of cooking on the stove top or in a rice cooker. Luckily for me, rice was always around when I wanted to have some and usually in large amounts. My best friend's mom was Filipino and there was always rice, I mean always.
How I learned to cook rice is a two part story. The first is, once again, I ended up falling in love with someone who could make rice and it made me happy as a clam. A few years ago, I became pretty ill and rice became, well, a staple while I worked to get myself healthy again. One day when I wanted to have rice and I used all I had earlier in the day, it became clear I needed to learn how to make it. So, when my girlfriend returned home from work, she began to teach me how to make rice so I could support my rice habit. The best thing about this recipe is it is pretty simple and works every time. Although this is very basic recipe, rice can be used in any cuisine and with any cooking technique.
Here is the recipe:
2 c water
1 c rice
A pinch of salt
Bring two cups of water to a boil and add the salt.Add the rice when water reaches a boil and turn the heat down to medium low. You want a very steady, gentle simmer for the rice to cook evenly -- a rice sauna! While the rice simmers stir ever 2-3 minutes so it does not stick to the bottom of the pan.
After most of the water has evaporated and absorbed by rice. You can easily recognize this point in the cooking process as the rice will be clearly exposed with a small amount of water in the pot. At this point, move rice to a cold burner and put a lid on the pot, leaving about a inch gap for steam to escape while the rice completes its cooking. After 10 minutes just fluff with a fork and serve.
*Note: We like our rice slightly al dente, which means there's a slight bite to each individual rice kernel. If you like your rice a bit softer you may cook it a couple of extra minutes on the heat and let additional water absorb/evaporate before letting it cool.
Done!
Here are a few photos to go along with this recipe:
 You'll see in the photo above the rice cooking at a gentle simmer. You will want the simmer to be a little more active than is visible here, but not a hard boil.
 OK, this photo shows you the point where you will want to pull the rice off the heat and move the pot to cold burner, partially covered with a lid. As noted above, if you want your rice to be a little softer and a little less moist than our recipe, let the rice remain on the heat a couple extra minutes.
 Just like that, you have cooked rice. So, we can all cross rice off the list of intimidating things to cook!
I had never tried to make it as all I had ever heard were horror stories of cooking on the stove top or in a rice cooker. Luckily for me, rice was always around when I wanted to have some and usually in large amounts. My best friend's mom was Filipino and there was always rice, I mean always.
How I learned to cook rice is a two part story. The first is, once again, I ended up falling in love with someone who could make rice and it made me happy as a clam. A few years ago, I became pretty ill and rice became, well, a staple while I worked to get myself healthy again. One day when I wanted to have rice and I used all I had earlier in the day, it became clear I needed to learn how to make it. So, when my girlfriend returned home from work, she began to teach me how to make rice so I could support my rice habit. The best thing about this recipe is it is pretty simple and works every time. Although this is very basic recipe, rice can be used in any cuisine and with any cooking technique.
Here is the recipe:
2 c water
1 c rice
A pinch of salt
Bring two cups of water to a boil and add the salt.Add the rice when water reaches a boil and turn the heat down to medium low. You want a very steady, gentle simmer for the rice to cook evenly -- a rice sauna! While the rice simmers stir ever 2-3 minutes so it does not stick to the bottom of the pan.
After most of the water has evaporated and absorbed by rice. You can easily recognize this point in the cooking process as the rice will be clearly exposed with a small amount of water in the pot. At this point, move rice to a cold burner and put a lid on the pot, leaving about a inch gap for steam to escape while the rice completes its cooking. After 10 minutes just fluff with a fork and serve.
*Note: We like our rice slightly al dente, which means there's a slight bite to each individual rice kernel. If you like your rice a bit softer you may cook it a couple of extra minutes on the heat and let additional water absorb/evaporate before letting it cool.
Done!
Here are a few photos to go along with this recipe:
Wednesday, April 15, 2015
Bolognese That Will Bowl You Over
OK, tonight we are talking about a classic Italian pasta dish -- Bolognese. It is simply a rich flavored, tomato based sauce. Sounds good right? There is only one problem with this amazing sauce, it is not known to be a quick cooking dish.
You can find a million recipes that list the cook time between 3-12 hours to get this right. Who can spare that time? Even on weekends that can be hard unless you use a crock-pot. By the way, you can make the sauce that way if you prefer. However, I have a recipe that you can have up on the table in 45-60 minutes instead of 12 hours. That sounds even better, doesn't it?
Here is what's behind door number one!

Recipe courtesy of Giada De Laurentiis
http://www.foodnetwork.com/recipes/giada-de-laurentiis/simple-bolognese-recipe2.html
Let's talk changes:
We love garlic. So, instead of 2 cloves we use about 6-7 cloves, adjust accordingly.
Meat mash-up. The first time we made this we did try the ground beef but found the pasta to be overly heavy and it left a unpleasant coating in the mouth with each bite. We loved the recipe and wanted to find another option so we turned to ground turkey. Ground dark turkey meat will give you the richness and flavor, and in my opinion, you won't miss the ground beef at all. Since it is just the two of us we do three quarters of a pound and do just fine.
Basil makes everything better. We prefer basil to parsley, so that is what we use when we make this sauce.
Finally, we love Parmesan cheese to finish this pasta. The cheese is rich, creamy, and brings a pleasant finish of salt with each bite. We prefer fresh shaved Parmesan, which requires a small piece of Parmesan cheese to use as needed, but if you don't have the access to a whole piece of Parmesan then the pre-shaved stuff works just as well.
Speaking of salt, seasoning is really important here. Remember to season often with this dish to build the layers of flavor. Also, taste, taste, and taste. Taste is the key that unlocks the door to great fare.
 Just so you can get an idea of what you will need I have included this photo for you.
 Level one, onions and garlic. Keep an eye on the heat level as each stove cooks a little differently. Don't rush, you will have time to make sure everything is cooked through.

All veggies report to the pan. Repeat, all veggies report to the pan. This is not a drill.
 The ground turkey has been working with all the vegetables for a few minutes here.
 Right before you let this simmer add a dash of dried oregano, dried basil, between 1/8-1/4 cup of wine (something you would be happy to drink). Once this starts to simmer stir everything together and continue to stir every few minutes until the sauce has reduced enough.
Feel like the sauce is lacking the special something? With a couple minutes left before you are ready to serve add 4-8 tablespoons worth of left over pasta water to the saucepan.. Why? The pasta water will have salt in it, which will help you give the sauce additional flavor and you might be able to add less salt as a result. Also, the starch in the pasta water will help give the sauce more body and richness, and will help the sauce adhere to the noodles better.
That's it! Done. You won't regret it. :)
You can find a million recipes that list the cook time between 3-12 hours to get this right. Who can spare that time? Even on weekends that can be hard unless you use a crock-pot. By the way, you can make the sauce that way if you prefer. However, I have a recipe that you can have up on the table in 45-60 minutes instead of 12 hours. That sounds even better, doesn't it?
Here is what's behind door number one!
Recipe courtesy of Giada De Laurentiis
http://www.foodnetwork.com/recipes/giada-de-laurentiis/simple-bolognese-recipe2.html
Let's talk changes:
We love garlic. So, instead of 2 cloves we use about 6-7 cloves, adjust accordingly.
Meat mash-up. The first time we made this we did try the ground beef but found the pasta to be overly heavy and it left a unpleasant coating in the mouth with each bite. We loved the recipe and wanted to find another option so we turned to ground turkey. Ground dark turkey meat will give you the richness and flavor, and in my opinion, you won't miss the ground beef at all. Since it is just the two of us we do three quarters of a pound and do just fine.
Basil makes everything better. We prefer basil to parsley, so that is what we use when we make this sauce.
Finally, we love Parmesan cheese to finish this pasta. The cheese is rich, creamy, and brings a pleasant finish of salt with each bite. We prefer fresh shaved Parmesan, which requires a small piece of Parmesan cheese to use as needed, but if you don't have the access to a whole piece of Parmesan then the pre-shaved stuff works just as well.
Speaking of salt, seasoning is really important here. Remember to season often with this dish to build the layers of flavor. Also, taste, taste, and taste. Taste is the key that unlocks the door to great fare.
All veggies report to the pan. Repeat, all veggies report to the pan. This is not a drill.
Feel like the sauce is lacking the special something? With a couple minutes left before you are ready to serve add 4-8 tablespoons worth of left over pasta water to the saucepan.. Why? The pasta water will have salt in it, which will help you give the sauce additional flavor and you might be able to add less salt as a result. Also, the starch in the pasta water will help give the sauce more body and richness, and will help the sauce adhere to the noodles better.
That's it! Done. You won't regret it. :)
Tuesday, April 14, 2015
Roasty Toasty Bird 2.0
As I alluded, you will never look a store bought rotisserie chicken the same after you try this recipe. I believe that this will be a recipe you come back to time and time again. Whether you make this chicken on a week night, special occasion, it won't matter -- it's so delicious you just might dream about it!
Here is the your payoff:

The recipe am I using has been adapted from the Lemon and Garlic Roast Chicken from Ina Garten. I have provided the full recipe via the link below.
http://www.foodnetwork.com/recipes/ina-garten/lemon-and-garlic-roast-chicken-recipe.html
Here's how we rock this recipe with our changes:
Lets look at a few photos that will help you with this bird:


On the left, the ingredients that you are going to use to stuff the cavity, on the right is what your cavity should look like. Layer as follows, half a head of garlic, 2 lemon quarters, fresh thyme and fresh rosemary, 2nd half the head of garlic, and last two quartered lemons. The peeled garlic cloves we will use later.
 Okay, here is the chicken ready to go in the oven. Two important tips, you can go a little lighter on the paprika and that will help the skin of the chicken not be so dark as it cooks. Note: Make sure to place your oven rack on the lowest position in the oven before putting the chicken into the oven to roast.
While roasting, if you think the skin is getting too dark and you still have a lot of time left to go, cover the chicken with foil for the last 30 minutes or so. This will keep the skin from getting too dark. In order to keep the bird moist, pull the chicken out of the oven after roasting for 1 hr & 25 minutes to 1hr & 27 minutes. You are going to let this bird rest on a cooling rack (an oven mitt or you can put it on a cold burner if you don't have a cooling rack) and it will finish cooking -- otherwise known as carryover heat. So it is OK to pull the chicken out just a couple minutes early.
 After you pull the bird from the oven, let the chicken rest for 15-20 minutes covered in foil to cool. Then you are ready to move it to a cutting board and slice. When you are ready to save your leftovers, remove the aromatics from the cavity as they can leave a funny flavor in the chicken once it's been cooked.
Here is the your payoff:
The recipe am I using has been adapted from the Lemon and Garlic Roast Chicken from Ina Garten. I have provided the full recipe via the link below.
http://www.foodnetwork.com/recipes/ina-garten/lemon-and-garlic-roast-chicken-recipe.html
Here's how we rock this recipe with our changes:
- Don't bother with the bacon. Originally, we were concerned about the bacon being used mostly for flavor and keeping the meat moist, but we wanted to know if the recipe could be done sans-bacon. Little did we know, that this would be the dream recipe. However, the bacon was giving us reason to reconsider. Although we had great success without the bacon, to make sure we were being fair to the recipe we made it with the bacon to see what would happen. Honestly, we noticed very little difference and it didn't impact the flavor profile at all. So, for us, this wins without the bacon time again. As you can see, we love our bacon, so this isn't a knock against our favorite smoked meat, just about what it brought to this party.
- As you can see from the photo included below, you don't need to worry about tying the chicken legs together. It makes the presentation look really cool, but it is not necessary for a successfully roasted bird.
- Save the gravy train. As I have stated, this chicken has plenty of flavor and will be more than moist. Also, if you need a little extra sauce, spoon over a bit of the pan drippings over the chicken meat, as the flavor from the lemons will bring a much needed reprieve from the richness of this meat.
Lets look at a few photos that will help you with this bird:
On the left, the ingredients that you are going to use to stuff the cavity, on the right is what your cavity should look like. Layer as follows, half a head of garlic, 2 lemon quarters, fresh thyme and fresh rosemary, 2nd half the head of garlic, and last two quartered lemons. The peeled garlic cloves we will use later.
While roasting, if you think the skin is getting too dark and you still have a lot of time left to go, cover the chicken with foil for the last 30 minutes or so. This will keep the skin from getting too dark. In order to keep the bird moist, pull the chicken out of the oven after roasting for 1 hr & 25 minutes to 1hr & 27 minutes. You are going to let this bird rest on a cooling rack (an oven mitt or you can put it on a cold burner if you don't have a cooling rack) and it will finish cooking -- otherwise known as carryover heat. So it is OK to pull the chicken out just a couple minutes early.
Monday, April 13, 2015
Party on the Barbie
Yes, we are back on the grill! Okay, except for one element, but we will get there.
In case you missed it, lets review. Tonight we have steak, roasted red peppers, and a vegetable with a license to kill.
Ready? Good, let's get at it!
Roasted red peppers or any color that works for you.
 In a dish, roll the peppers around in olive oil, salt, and pepper till the peppers are well coated on all sides.
 Time to apply the heat, medium high will work well here.

Let each side get charred and keep turning. Don't worry, this is how we achieve flavor and it will work out.

Once the peppers obtain this level of char on the skin, pull them off the heat, place them in a bowl, cover with foil, and wait. Why do this? Now that we have applied all this heat we are going to use the steam from the cooked peppers to help remove their skins. Trust me, otherwise it isn't easy to remove the skins. Now, cover with plastic wrap and wait another 10 minutes or so.
 You will then be able to peel the skins off the peppers. *Warning* the peppers will be super hot still, so protect your fingertips and use a fork to pull off the skins or just wait a little longer until the peppers are cool enough to handle.
 Here are your finished roasted peppers. These are amazing on salads, sandwiches, an olive or meat tray, soups, and pastas. Did I say pasta?
After you have gotten all your peppers peeled, throw a few in a blender with a bit of half and half or milk, salt, pepper, a garlic clove or two, and a little liquid from the roasted peppers. Congratulations! You have just made a killer roasted pepper pasta sauce. Oh, I suppose you would like a photo of that too? Oh OK -- here you are.
 Roasted red pepper sauce complete.
 This is fettuccine with roasted red pepper sauce, spinach, arugula, and a little sausage. Feel free to omit the sausage for a vegetarian version and this will still be amazing, I promise!
Steak:
We are using a rib-eye steak tonight. This cut of meat has the most flavor, it is pretty forgiving when cooking, and relatively economical. I recommend, if you can, finding a good butcher that will cut you the size you want. You only need 4 to 6 oz per person for a proper portion.
 Alright, so before you cook a large piece of steak or pork, you want to set it on the counter for a little while to let it come to room temperature. Before you throw me into the fire, I can assure that you leaving a piece of pork or steak out for a up to a couple of hours won't cause you to take a trip to the ER or leave you on your death bed. If you left it out for a few days and moved it between hot and cold climates, more or less humidity, and exposed it to other contaminants, then yes, you would be asking for trouble!
Next, like our short ribs recipe, you want to salt the rib-eye pretty heavily, as shown in the photo (above). Again, this heavy dose of salt isn't a sure fire sign of bad cholesterol or anything like that. If you have to add salt to your coffee, cereal, lunch, afternoon snack, dinner and dessert, then yes, you might have a bit of problem. Seriously, we are going to lose some of this during cooking and the meat is going to absorb this salt -- which = flavor.
 Season well with fresh ground pepper as well.
 Look Ma, no salt! The steak has taken all that in and created a glossy finish that will help develop color when cooking the steak.
 The steak is done! Cook it for about 4 to 5 minutes a side for medium rare. Make sure the grill is hot, as medium high heat is the target. When the steak hits the grill, don't move it! You won't get the color you want if you keep moving it. You should only turn the steak a total of 4 times in the entire cook process. When you take the steak off the grill, let it rest. This will help the juices redistribute throughout the meat. I usually tent my steak with foil for another 10 minutes once it is taken off the heat.
 I will give you a minute to take in these photos.
Last but not least, the 007 of vegetables....Sprout, Brussel Sprout.
I know of all the brussel sprout horror stories, but I think these photos will change everything. We make this a few times a week.
.jpg) The formidable and intimidating brussel sprout.
The formidable and intimidating brussel sprout.
.jpg) First up, cut the stem end off as demonstrated here.
First up, cut the stem end off as demonstrated here.
 Cut the brussel in half, peel the exterior leaves that make look discolored or funny. The external leaves will come off really easily.
 Heat a pan with a good bit of olive oil and put it on medium heat.
 The brussel sprouts absorb the oil as they get good color on them. Put the
brussels in a middle or large saute pan when it starts to smoke and get hot. *Note: Move the pan off the
heat if it gets too hot. Place the brussels in saute pan cut side down.
The brussel sprouts absorb the oil as they get good color on them. Put the
brussels in a middle or large saute pan when it starts to smoke and get hot. *Note: Move the pan off the
heat if it gets too hot. Place the brussels in saute pan cut side down.
 After about 4 minutes you should have brussels that look like the
photo below. At this point you want to add water into the pan about
two-thirds of the way up. Don't submerge the sprouts in the water. Just
enough where most of the brussel sprout is submerged. OK, turn the heat up to
medium high and cook until the sprouts can be pierced with a easily
with a fork with a little bit of resistance.
After about 4 minutes you should have brussels that look like the
photo below. At this point you want to add water into the pan about
two-thirds of the way up. Don't submerge the sprouts in the water. Just
enough where most of the brussel sprout is submerged. OK, turn the heat up to
medium high and cook until the sprouts can be pierced with a easily
with a fork with a little bit of resistance.
 Congratulations, these are your finished brussel sprouts!
Put everything on a plate and enjoy!

In case you missed it, lets review. Tonight we have steak, roasted red peppers, and a vegetable with a license to kill.
Ready? Good, let's get at it!
Roasted red peppers or any color that works for you.
Let each side get charred and keep turning. Don't worry, this is how we achieve flavor and it will work out.
Once the peppers obtain this level of char on the skin, pull them off the heat, place them in a bowl, cover with foil, and wait. Why do this? Now that we have applied all this heat we are going to use the steam from the cooked peppers to help remove their skins. Trust me, otherwise it isn't easy to remove the skins. Now, cover with plastic wrap and wait another 10 minutes or so.
After you have gotten all your peppers peeled, throw a few in a blender with a bit of half and half or milk, salt, pepper, a garlic clove or two, and a little liquid from the roasted peppers. Congratulations! You have just made a killer roasted pepper pasta sauce. Oh, I suppose you would like a photo of that too? Oh OK -- here you are.
Steak:
We are using a rib-eye steak tonight. This cut of meat has the most flavor, it is pretty forgiving when cooking, and relatively economical. I recommend, if you can, finding a good butcher that will cut you the size you want. You only need 4 to 6 oz per person for a proper portion.
Next, like our short ribs recipe, you want to salt the rib-eye pretty heavily, as shown in the photo (above). Again, this heavy dose of salt isn't a sure fire sign of bad cholesterol or anything like that. If you have to add salt to your coffee, cereal, lunch, afternoon snack, dinner and dessert, then yes, you might have a bit of problem. Seriously, we are going to lose some of this during cooking and the meat is going to absorb this salt -- which = flavor.
Last but not least, the 007 of vegetables....Sprout, Brussel Sprout.
I know of all the brussel sprout horror stories, but I think these photos will change everything. We make this a few times a week.
Put everything on a plate and enjoy!
Subscribe to:
Comments (Atom)